What makes a video look professional?
It is almost never the camera. Professional is the absence of distractions: even image, clean sound, deliberate pacing and a hook that earns the view. Here is what actually separates polished from homemade, and how to check it.
By Thomas, founder of CutScore · Published · Updated

Most people think "professional" lives inside the camera. Buy the better body, the faster lens, the cinema picture profile, and the video will finally look the part. I believed that too. Then I shot a stretch of videos on genuinely nice gear and they still looked homemade, and I could not tell you why. The footage was sharp. It just felt cheap.
Here is what I eventually worked out. Professional is not a thing you add. It is a set of mistakes you remove. The viewer is not consciously grading your exposure or counting your cuts. They feel friction, the tiny moments where something is off, and they read the sum of that friction as "amateur." One green-tinted shot. Music two notches too loud. A caption sliding off the bottom of the frame. None of those is fatal alone, and together they quietly tank the whole thing.
So the real question is not "what makes a video look professional," it is what makes a video look amateur, and how do I take it out. The answer breaks into five areas, and not one of them needs a new camera. Here they are.
The five signals that make a video look professional.
Each one has a target you can actually hit, and each one is something a viewer notices the second it goes wrong. Get these consistent and the video reads as polished, whatever you shot it on.
| Signal | What "professional" looks like | The amateur tell when it slips |
|---|---|---|
| Exposure + colour | even, neutral | Dark, blown-out or green-tinted footage reads as raw and ungraded. |
| Sharpness + stability | subject sharp, steady | Soft focus and shake look like a mistake, not a choice. |
| Loudness | ≈ −14 LUFS | Too quiet and the video feels weak next to everything else in the feed. |
| Voice vs music | voice on top | Music burying the speech is the single most common amateur tell. |
| Pacing · shot length | deliberate, fits format | Long static holds and dead air make a viewer feel the runtime. |
| The first 3 seconds | one reason to stay | A slow logo intro tells people nothing happened yet, so they leave. |
| On-screen text | readable, in-frame | Tiny, low-contrast captions drifting off the edge scream homemade. |
Checking every one of these by eye, on every video, gets old fast. CutScore measures them in one pass and tells you which ones are dragging your video down, with the exact fix.
What each signal actually does, and how to fix it.
1. The image: even exposure and neutral colour
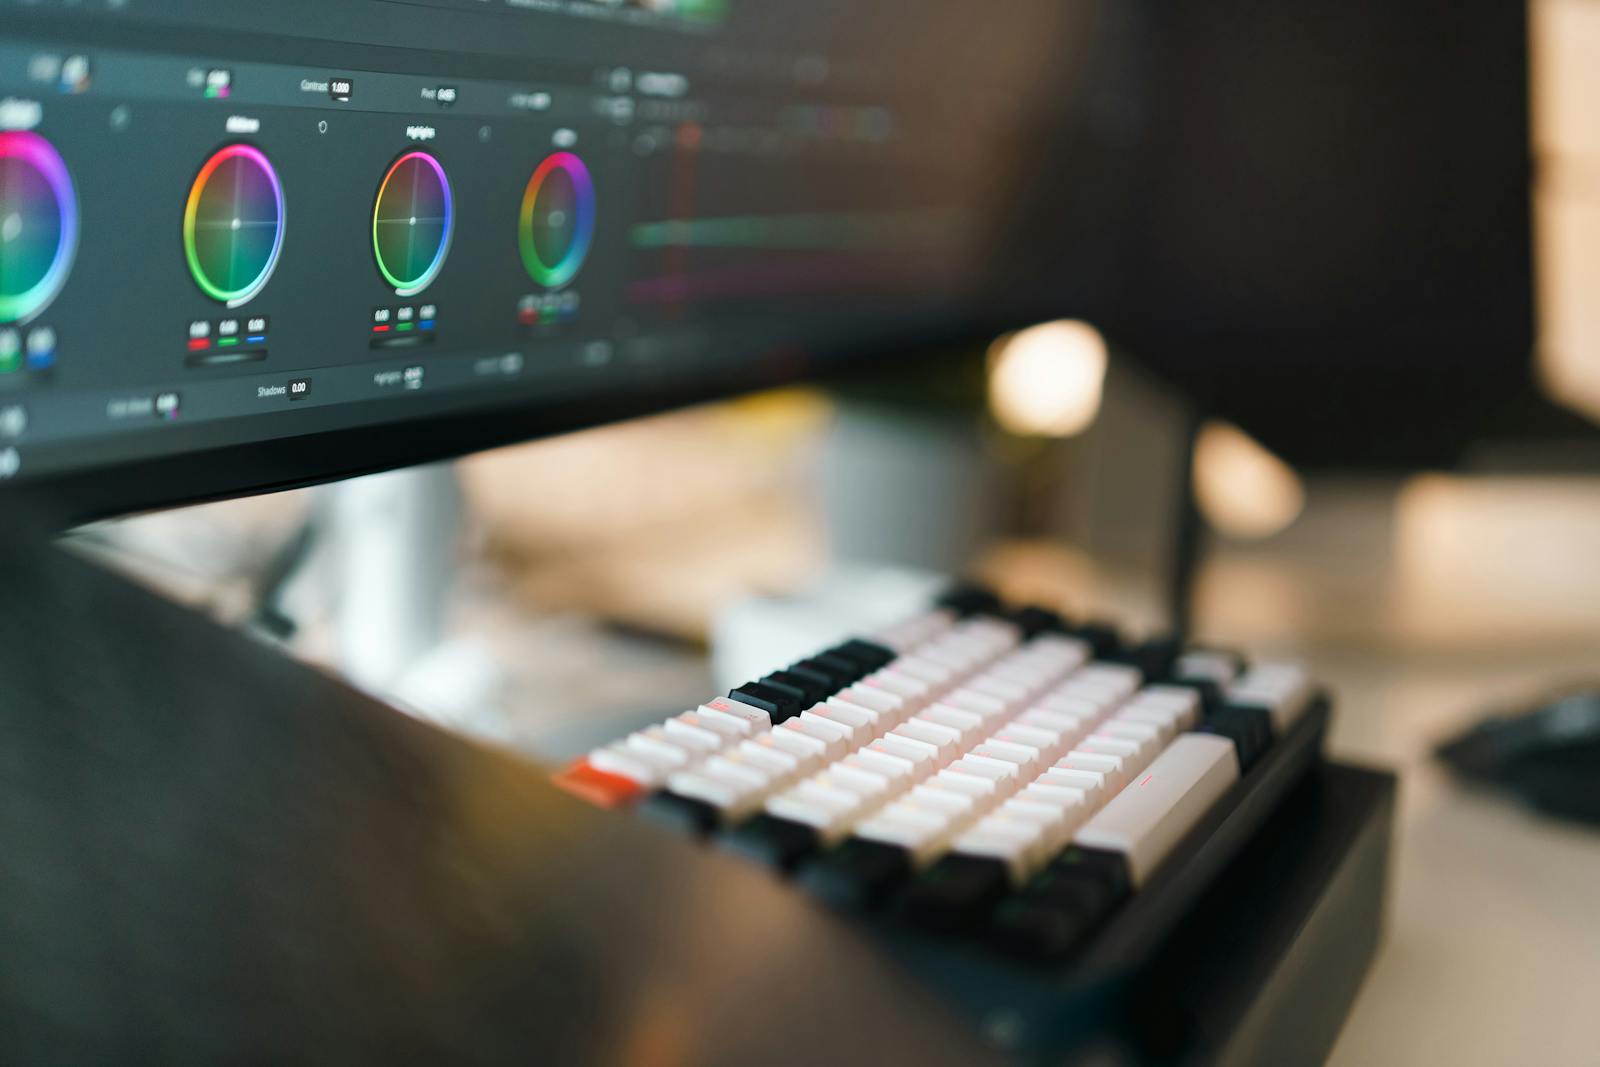
This is the first thing a viewer reads, before a single word is heard. Professional footage is exposed so you can see detail in both the shadows and the highlights, and the colour looks neutral rather than tinted. Set your screen brightness to something normal, then look for shadows gone solid black and highlights blown to pure white. Check that whites actually look white, not blue or orange. If skin tone has drifted green, your white balance is off. A short colour pass turns a flat, dark, slightly-off clip into something that simply reads as finished. This image family is half of what we analyze, because it is the part people judge fastest.
2. The image again: sharp where it counts, and steady
Two more image faults read instantly as amateur. Soft focus, where the subject is not crisp, looks like a missed shot rather than a stylistic blur. And an unsteady frame, whether it is handheld shake or the rubbery wobble of rolling shutter, pulls attention straight off whatever you are saying. The fix for sharpness is mostly in the shoot: lock focus on the subject and check it before you commit. The fix for steadiness is a tripod, a gimbal, or stabilisation in the edit. None of that needs a better camera. It needs you to not skip the boring step.
3. The sound: the part everyone underestimates
People forgive a soft shot. They do not forgive bad audio, and audio is where most "looks cheap" videos actually fall down. Two numbers carry most of the weight. Loudness, which you want near −14 LUFS for YouTube so your video does not feel timid next to the next one in the feed, and true peak, kept at or below −1 dBTP so nothing crackles after the platform re-encodes your file. Then the balance: listen on the worst speakers you own, and if the music is winning, pull it down four or five decibels. Clean, present, balanced sound does more for the "professional" feeling than almost any camera upgrade.
4. The pacing: deliberate, not just fast
You have seen your edit so many times it feels fast to you. It probably is not. The clearest single number for pace is average shot length, how long a shot holds before you cut. Professional editing is not about cutting quickly, it is about cutting on purpose: holding when the moment earns it, trimming the dead air when it does not. If a section drags, it is usually one shot held three seconds too long, repeated across the whole video. A well-placed jump cut removes that lull without a reshoot. The honest test: would you still be watching this if it were not yours?
5. The opening and the text: earn the view, then keep it legible
Watch your first three seconds as if you were thumbing past it. A professional video gives one clear reason to stay in that window. An amateur one opens with a logo sting and a "hey guys, so today," which tells the viewer nothing has happened yet. If your best moment lives at 0:40, a piece of it belongs at 0:01. Then the captions: roughly half your audience watches on mute, so read yours on a phone at arm's length. If you squint, the text is too small or too low-contrast. While you are at it, count the filler words, because a steady stream of "um" quietly undercuts the polish of everything else.
Here is a real CutScore report on an everyday video: every signal above scored, with timestamps and the exact fixes that move it from homemade to polished.
If you only fix three things first.
Most of the jump from "homemade" to "this person knows what they are doing" comes from these three. They are the cheapest wins, so do them before anything else.
By eye, by meter, or in one pass.
By eye and ear
Free, and better than nothing. The catch is that your senses adapt to your own video and your gear flatters it. Works best on someone else's video, or yours after a day away. Judge it against the five signals above so you are testing targets, not vibes. More on doing this honestly in reviewing your own video objectively.
With scopes and meters
Accurate and honest. A loudness meter, a waveform, a scope for exposure and colour. The cost is time and knowledge: you have to know the targets, open three tools, and read them right for every video. Great if you enjoy this. Most people do not, which is fine.
With a coach in one pass
Hand the file or a link to CutScore. It measures all five signals and more, against the right standard for your format, and gives you a 0 to 100 score with timestamped evidence and the fixes. No scopes to read. See a sample report, or read how it compares to measuring production quality by hand.
Frequently asked.
See exactly what is holding your video back.
CutScore checks every signal that separates professional from homemade and tells you precisely what to fix, with the evidence to back it up. Join the waitlist for early access.
You’re on the list.
We’ve noted your email. You’re in line for priority access and a free report when early access opens.